 ***
## What You're Building
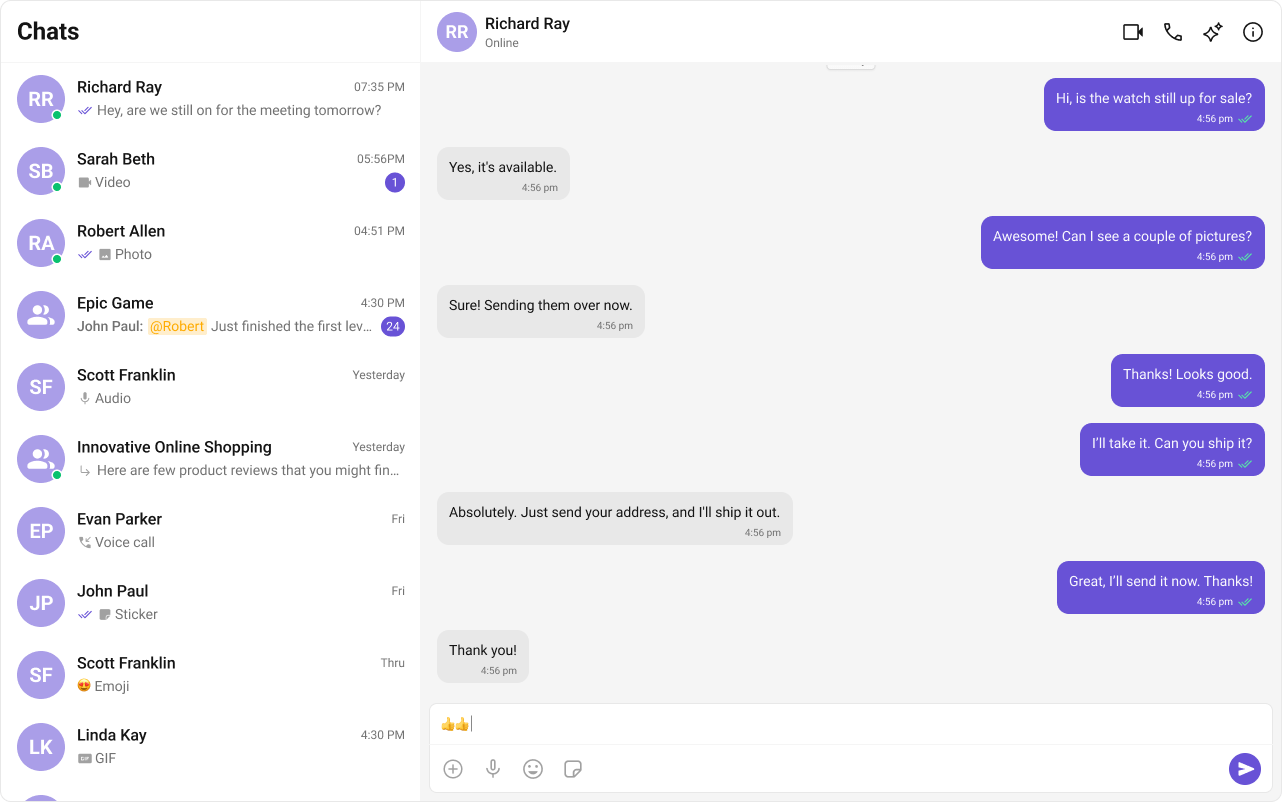
Three sections working together:
1. **Sidebar (conversation list)** — shows all active conversations (users and groups)
2. **Message view** — displays chat messages for the selected conversation in real time
3. **Message composer** — text input with support for media, emojis, and reactions
***
## Step 1 — Update AppComponent
Wire the conversation list and message components together in your root component. The UIKit's `ChatStateService` handles all the wiring — when a user clicks a conversation, `cometchat-conversations` updates the service, and the message components automatically react to the change.
```ts title="src/app/app.component.ts" expandable theme={null}
import { Component, inject, OnInit } from "@angular/core";
import {
CometChatUIKit,
CometChatConversationsComponent,
CometChatMessageHeaderComponent,
CometChatMessageListComponent,
CometChatMessageComposerComponent,
ChatStateService,
} from "@cometchat/chat-uikit-angular";
import { CometChat } from "@cometchat/chat-sdk-javascript";
@Component({
selector: "app-root",
standalone: true,
imports: [
CometChatConversationsComponent,
CometChatMessageHeaderComponent,
CometChatMessageListComponent,
CometChatMessageComposerComponent,
],
template: `
@if (isLoggedIn) {
***
## What You're Building
Three sections working together:
1. **Sidebar (conversation list)** — shows all active conversations (users and groups)
2. **Message view** — displays chat messages for the selected conversation in real time
3. **Message composer** — text input with support for media, emojis, and reactions
***
## Step 1 — Update AppComponent
Wire the conversation list and message components together in your root component. The UIKit's `ChatStateService` handles all the wiring — when a user clicks a conversation, `cometchat-conversations` updates the service, and the message components automatically react to the change.
```ts title="src/app/app.component.ts" expandable theme={null}
import { Component, inject, OnInit } from "@angular/core";
import {
CometChatUIKit,
CometChatConversationsComponent,
CometChatMessageHeaderComponent,
CometChatMessageListComponent,
CometChatMessageComposerComponent,
ChatStateService,
} from "@cometchat/chat-uikit-angular";
import { CometChat } from "@cometchat/chat-sdk-javascript";
@Component({
selector: "app-root",
standalone: true,
imports: [
CometChatConversationsComponent,
CometChatMessageHeaderComponent,
CometChatMessageListComponent,
CometChatMessageComposerComponent,
],
template: `
@if (isLoggedIn) {
Loading...
} `, styles: ` :host { display: flex; height: 100vh; width: 100vw; } .chat-layout { display: flex; width: 100%; height: 100%; } .sidebar { width: 360px; border-right: 1px solid #e0e0e0; } .chat-window { flex: 1; display: flex; flex-direction: column; } .empty-conversation { height: 100vh; width: 100%; display: flex; justify-content: center; align-items: center; background: var(--cometchat-background-color-03, #F5F5F5); color: var(--cometchat-text-color-secondary, #727272); font: var(--cometchat-font-body-regular, 400 14px Roboto); } `, }) export class AppComponent implements OnInit { chatStateService = inject(ChatStateService); isLoggedIn = false; ngOnInit(): void { CometChatUIKit.getLoggedinUser().then((user: CometChat.User | null) => { if (!user) { CometChatUIKit.login("cometchat-uid-1") .then(() => (this.isLoggedIn = true)) .catch(console.log); } else { this.isLoggedIn = true; } }); } } ``` How it works: * `cometchat-conversations` calls `ChatStateService.setActiveConversation()` automatically when a conversation is clicked. * `setActiveConversation()` extracts the `User` or `Group` and sets it as the active entity, enforcing mutual exclusivity (setting a user clears the group, and vice versa). * `cometchat-message-header`, `cometchat-message-list`, and `cometchat-message-composer` auto-subscribe to `ChatStateService` — no `[user]` or `[group]` bindings needed. * The `@if` block reads `chatStateService.activeUser()` and `chatStateService.activeGroup()` signals to show the chat window or the empty state.