> ## Documentation Index
> Fetch the complete documentation index at: https://cometchat-22654f5b-docs-rn-guide-message-privately.mintlify.site/llms.txt
> Use this file to discover all available pages before exploring further.
# Message Template
> Message Template — CometChat documentation.
## Overview
A MessageTemplate provides you with the capability to define and customize both the structure and the behavior of the [MessageBubble](/ui-kit/android/v4/message-bubble). It acts as a schema or design blueprint for the creation of a variety of [MessageBubble](/ui-kit/android/v4/message-bubble) components, allowing you to manage the appearance and interactions of [MessageBubble](/ui-kit/android/v4/message-bubble) within your application effectively and consistently.
### Structure
 The MessageBubble structure can typically be broken down into the following views:
1. **Leading view**: This is where the sender's avatar is displayed. It's typically on the left of the MessageBubble for messages from others and on the right for messages from the current user.
2. **Header view**: This displays the sender's name and is especially useful in group chats where multiple users are sending messages.
3. **Content view**: This is the core of the MessageBubble where the message content (text, images, videos, etc.) is displayed.
4. **Bottom view**: This view can be used to extend the MessageBubble with additional elements, such as link previews or a 'load more' button for long messages. It's typically placed beneath the Content view.
5. **Footer view**: This is where the timestamp of the message and its delivery or read status are displayed. It's located at the bottom of the MessageBubble.
### Properties
MessageTemplate provides you with methods that allow you to alter various properties of the MessageBubble. These properties include aspects such as the `type` and `category` of a message, the appearance and behavior of the header, content, and footer sections of the message bubble,
1. **Type**
Using `setType()` you can set the type of CometChatMessage, This will map your MessageTemplate to the corresponding CometChatMessage. You can set the MessageTemplate Type using the following code snippet.
```swift theme={null}
messageTemplate.setType(UIKitConstants.MessageType.CUSTOM);
```
2. **Category**
Using `.setCategory()` you can set the category of a MessageTemplate. This will create a MessageTemplate with the specified category and link it with a CometChatMessage of the same category.
Please refer to our guide on [Message Categories](/sdk/android/message-structure-and-hierarchy) for a deeper understanding of message categories.
```swift theme={null}
messageTemplate.setCategory(UIKitConstants.MessageCategory.CUSTOM);
```
3. **Header View**
The .`setHeaderView()` method allows you to assign a custom header view to the MessageBubble. By default, it is configured to display the sender's name.
```swift theme={null}
messageTemplate.setHeaderView(Function3);
```
4. **Content View**
The `.setContentView()` method allows you to assign a custom content view to the MessageBubble. By default, it displays the [Text Bubble](/ui-kit/android/v4/text-bubble), [Image Bubble](/ui-kit/android/v4/image-bubble), [File Bubble](/ui-kit/android/v4/file-bubble), [Audio Bubble](/ui-kit/android/v4/audio-bubble), or [Video Bubble](/ui-kit/android/v4/video-bubble), depending on the message type.
```swift theme={null}
messageTemplate.setContentView(Function3);
```
5. **Footer View**
The `.setFooterView()` method allows you to assign a custom Footer view to the MessageBubble. By default, it displays the receipt and timestamp.
```swift theme={null}
messageTemplate.setFooterView(Function3);
```
6. **Bottom View**
The `.setBottomView()` method allows you to assign a custom Bottom view to the MessageBubble.By defuault is has buttons such as link previews or a 'load more' button for long messages.
```swift theme={null}
messageTemplate.setBottomView(Function3);
```
7. **Bubble View**
The `.setBubbleView()` method allows you to assign a custom Bubble view to the MessageBubble. By default, headerView, contentView, and footerView together form a message bubble.
```swift theme={null}
messageTemplate.setBubbleView(Function3);
```
8. **Options**
The `.setOptions()` lets you set the list of actions that a user can perform on a message. This includes actions like reacting to, editing, or deleting a message.
```swift theme={null}
messageTemplate.setOptions(Function3);
```
## Customization
Let's dive into how you can use the [properties](#properties) of MessageTemplate to customize an existing template or add a new one to the [MessageList](/ui-kit/android/v4/message-list) component.
The First step is to fetch the list of existing templates when you want to modify or add to them. This can be done using the getAllMessageTemplates() method from the DataSource of the CometChatUIKit class.
```swift theme={null}
List messageTemplates = CometChatUIKit.getDataSource().getAllMessageTemplates();
```
### Existing Templates
You will need to first get the MessageTemplate object for the type of message you want to customize. You will be customizing the TextMessage Bubble here. The code snippet to get the Text MessageTemplate is as follows.
```java theme={null}
List messageTemplates = CometChatUIKit.getDataSource().getAllMessageTemplates();
for(CometChatMessageTemplate template : messageTemplates){
if(template.getType().equals(UIKitConstants.MessageType.TEXT)){
// Code to customize text message template
}
}
```
```kotlin theme={null}
val messageTemplates: List = CometChatUIKit.dataSource.messageTemplates
for (template in messageTemplates) {
if (template.type == UIKitConstants.MessageType.TEXT) {
// Code to customize text message template
}
}
```
You will be using [Messages](/ui-kit/android/v4/messages#overview) Component for example here so to apply Template to Messages you will need to use `MessageListConfiguration`. This is because the [Set Templates](/ui-kit/android/v4/message-list#settemplate) function, which is used to apply the custom templates, belongs to the [MessageList](/ui-kit/android/v4/message-list) component.
You can apply MessageTemplates to Messages Component using the following code snippet.
```java theme={null}
MessageListConfiguration configuration = new MessageListConfiguration();
List messageTemplates = CometChatUIKit.getDataSource(getMessageTemplates()
for(CometChatMessageTemplate template : messageTemplates)
Log.e(TAG, "messageTemplate: Type = "+template.getType());
if(template.getType().equals(UIKitConstants.MessageType.TEXT))
// Code to customize text message template
}
}
configuration.setTemplates(messageTemplates);
cometChatMessages.setMessageListConfiguration(configuration);
```
```kotlin theme={null}
val configuration = MessageListConfiguration.Builder(context).build()
val messageTemplates = CometChatUI.getAllMessageTemplates()
for (template in messageTemplates) {
Log.e(TAG, "messageTemplate: Type = ${template.type}")
if (template.type == UIKitConstants.MessageType.TEXT) {
// Code to customize text message template
}
}
configuration.setTemplates(messageTemplates)
cometChatMessages.setMessageListConfiguration(configuration)
```
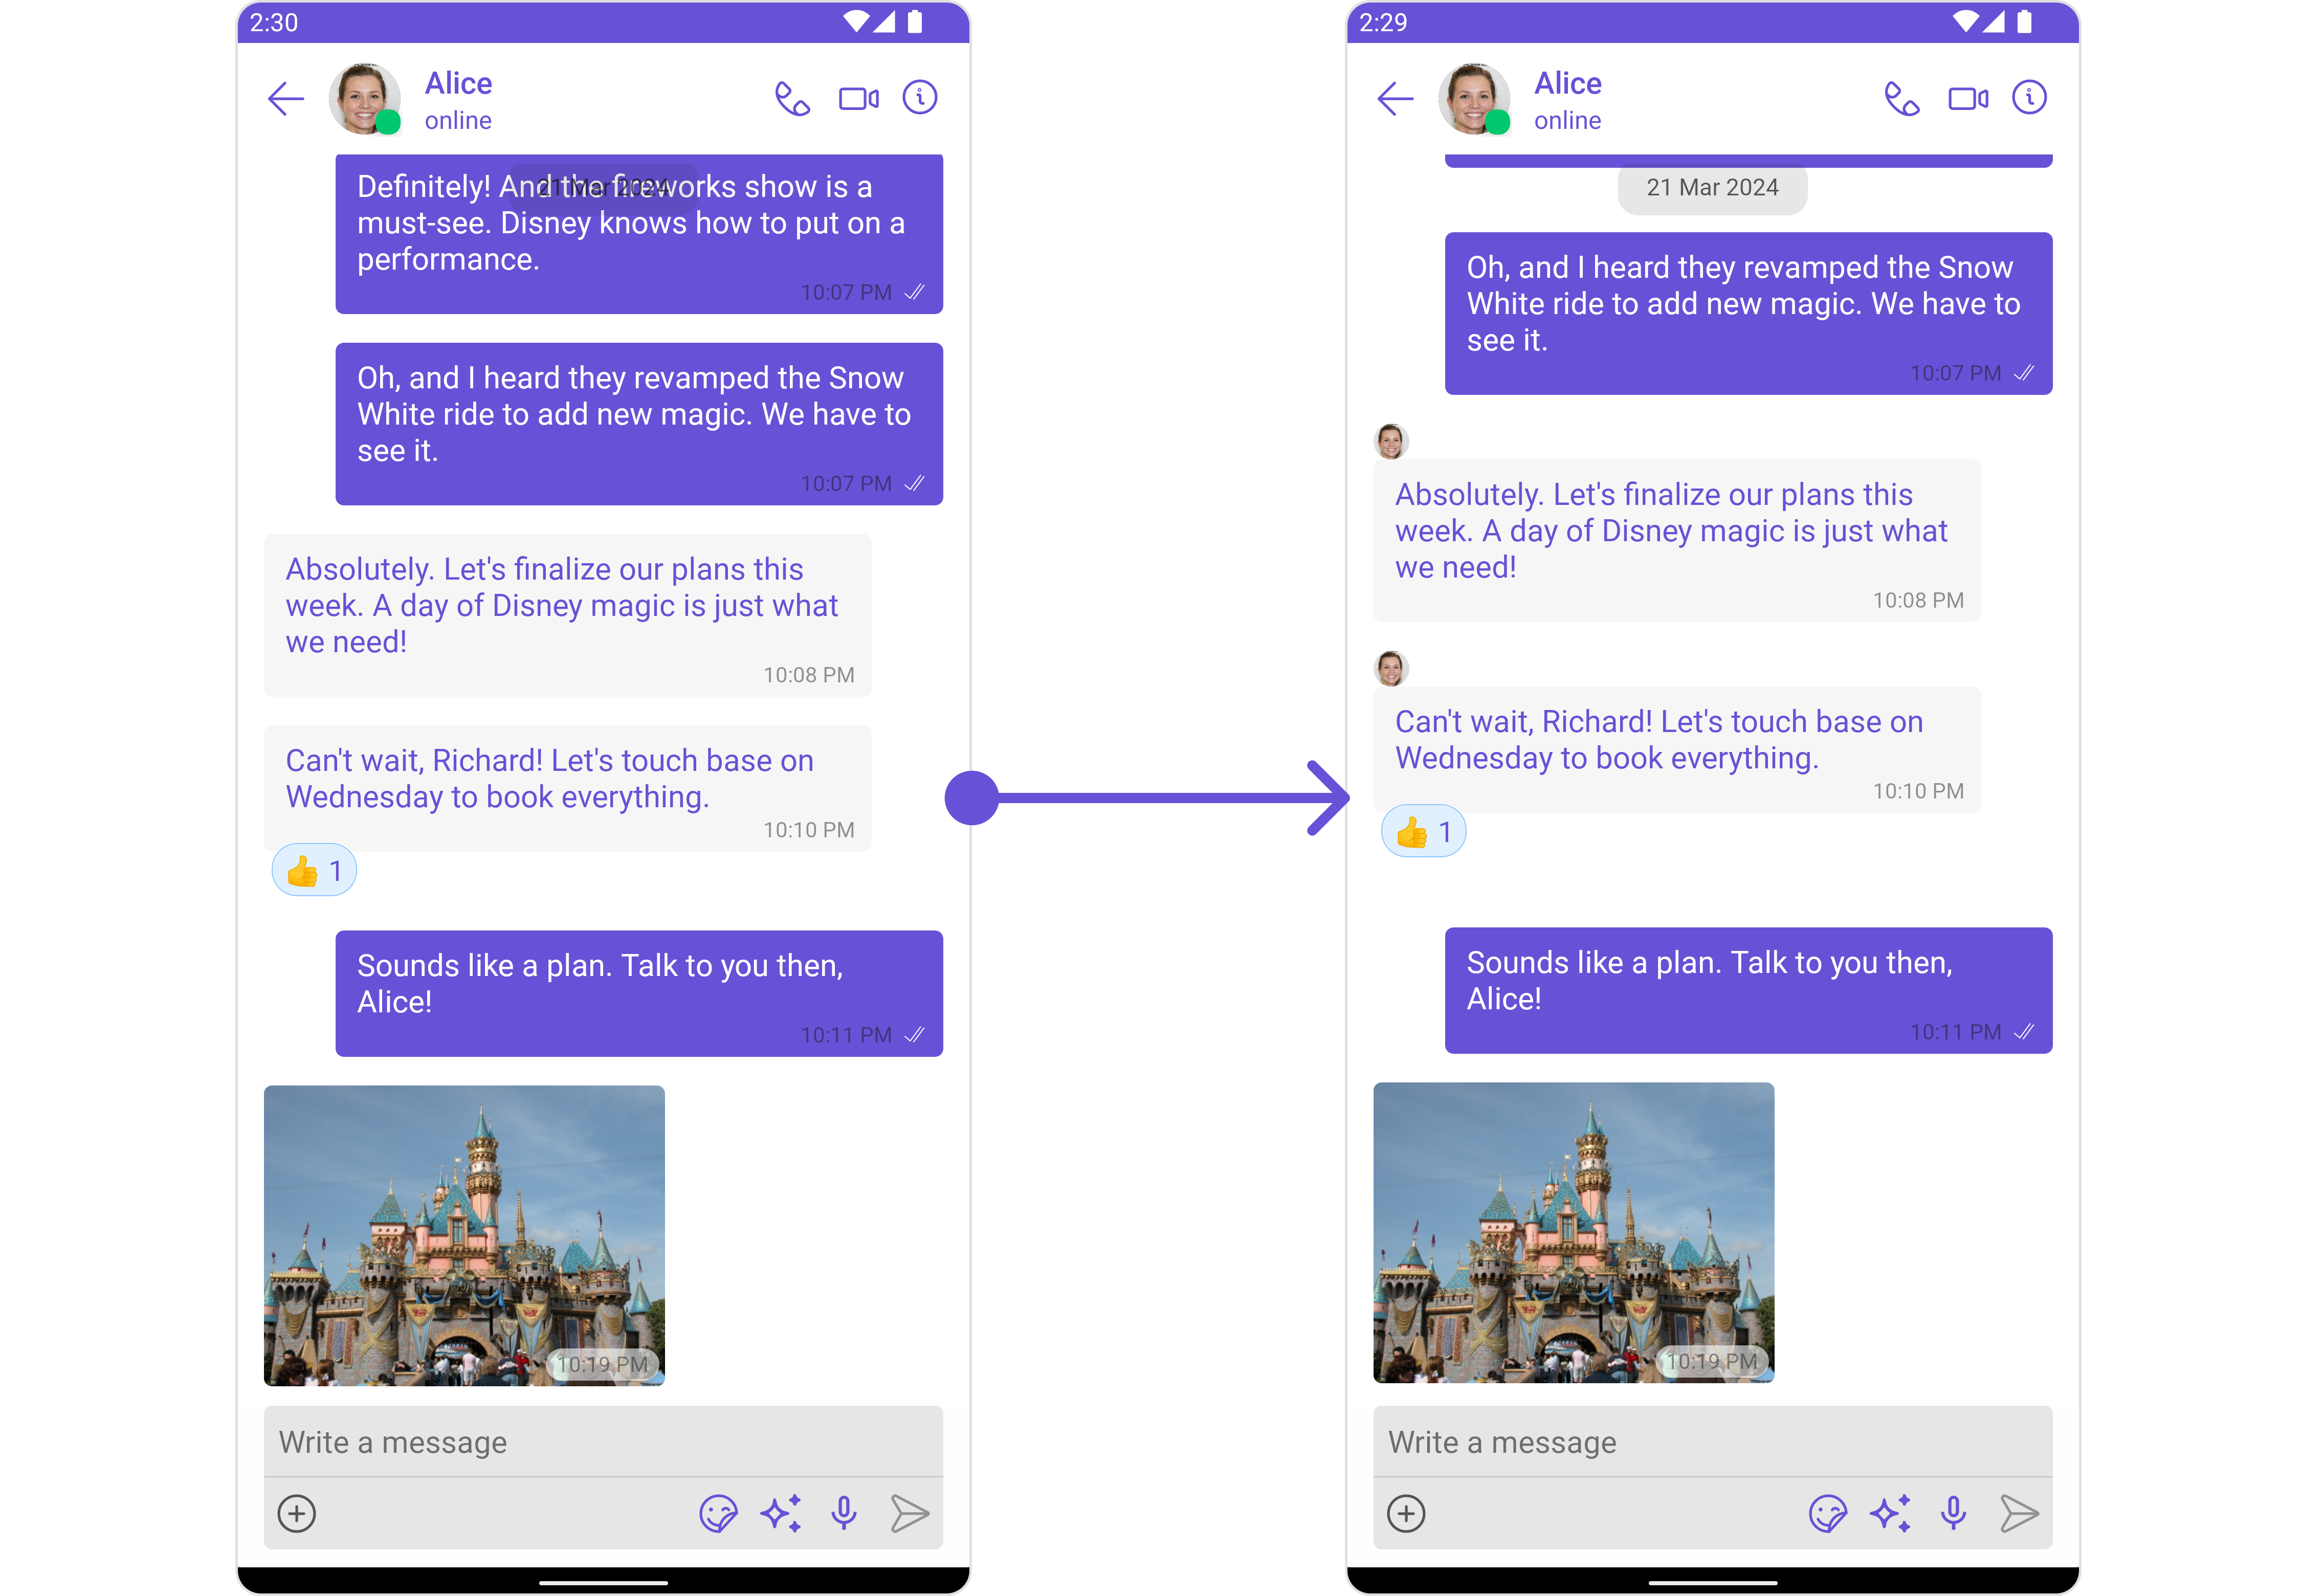
#### Header view
The `.setHeaderView()` method of MessageTemplate allows you to add custom views to the header of your message bubbles. In the example below, we will add a custom layout `custom_txt_header_layout.xml` to the header view of every text message in the MessageList.
The MessageBubble structure can typically be broken down into the following views:
1. **Leading view**: This is where the sender's avatar is displayed. It's typically on the left of the MessageBubble for messages from others and on the right for messages from the current user.
2. **Header view**: This displays the sender's name and is especially useful in group chats where multiple users are sending messages.
3. **Content view**: This is the core of the MessageBubble where the message content (text, images, videos, etc.) is displayed.
4. **Bottom view**: This view can be used to extend the MessageBubble with additional elements, such as link previews or a 'load more' button for long messages. It's typically placed beneath the Content view.
5. **Footer view**: This is where the timestamp of the message and its delivery or read status are displayed. It's located at the bottom of the MessageBubble.
### Properties
MessageTemplate provides you with methods that allow you to alter various properties of the MessageBubble. These properties include aspects such as the `type` and `category` of a message, the appearance and behavior of the header, content, and footer sections of the message bubble,
1. **Type**
Using `setType()` you can set the type of CometChatMessage, This will map your MessageTemplate to the corresponding CometChatMessage. You can set the MessageTemplate Type using the following code snippet.
```swift theme={null}
messageTemplate.setType(UIKitConstants.MessageType.CUSTOM);
```
2. **Category**
Using `.setCategory()` you can set the category of a MessageTemplate. This will create a MessageTemplate with the specified category and link it with a CometChatMessage of the same category.
Please refer to our guide on [Message Categories](/sdk/android/message-structure-and-hierarchy) for a deeper understanding of message categories.
```swift theme={null}
messageTemplate.setCategory(UIKitConstants.MessageCategory.CUSTOM);
```
3. **Header View**
The .`setHeaderView()` method allows you to assign a custom header view to the MessageBubble. By default, it is configured to display the sender's name.
```swift theme={null}
messageTemplate.setHeaderView(Function3);
```
4. **Content View**
The `.setContentView()` method allows you to assign a custom content view to the MessageBubble. By default, it displays the [Text Bubble](/ui-kit/android/v4/text-bubble), [Image Bubble](/ui-kit/android/v4/image-bubble), [File Bubble](/ui-kit/android/v4/file-bubble), [Audio Bubble](/ui-kit/android/v4/audio-bubble), or [Video Bubble](/ui-kit/android/v4/video-bubble), depending on the message type.
```swift theme={null}
messageTemplate.setContentView(Function3);
```
5. **Footer View**
The `.setFooterView()` method allows you to assign a custom Footer view to the MessageBubble. By default, it displays the receipt and timestamp.
```swift theme={null}
messageTemplate.setFooterView(Function3);
```
6. **Bottom View**
The `.setBottomView()` method allows you to assign a custom Bottom view to the MessageBubble.By defuault is has buttons such as link previews or a 'load more' button for long messages.
```swift theme={null}
messageTemplate.setBottomView(Function3);
```
7. **Bubble View**
The `.setBubbleView()` method allows you to assign a custom Bubble view to the MessageBubble. By default, headerView, contentView, and footerView together form a message bubble.
```swift theme={null}
messageTemplate.setBubbleView(Function3);
```
8. **Options**
The `.setOptions()` lets you set the list of actions that a user can perform on a message. This includes actions like reacting to, editing, or deleting a message.
```swift theme={null}
messageTemplate.setOptions(Function3);
```
## Customization
Let's dive into how you can use the [properties](#properties) of MessageTemplate to customize an existing template or add a new one to the [MessageList](/ui-kit/android/v4/message-list) component.
The First step is to fetch the list of existing templates when you want to modify or add to them. This can be done using the getAllMessageTemplates() method from the DataSource of the CometChatUIKit class.
```swift theme={null}
List messageTemplates = CometChatUIKit.getDataSource().getAllMessageTemplates();
```
### Existing Templates
You will need to first get the MessageTemplate object for the type of message you want to customize. You will be customizing the TextMessage Bubble here. The code snippet to get the Text MessageTemplate is as follows.
```java theme={null}
List messageTemplates = CometChatUIKit.getDataSource().getAllMessageTemplates();
for(CometChatMessageTemplate template : messageTemplates){
if(template.getType().equals(UIKitConstants.MessageType.TEXT)){
// Code to customize text message template
}
}
```
```kotlin theme={null}
val messageTemplates: List = CometChatUIKit.dataSource.messageTemplates
for (template in messageTemplates) {
if (template.type == UIKitConstants.MessageType.TEXT) {
// Code to customize text message template
}
}
```
You will be using [Messages](/ui-kit/android/v4/messages#overview) Component for example here so to apply Template to Messages you will need to use `MessageListConfiguration`. This is because the [Set Templates](/ui-kit/android/v4/message-list#settemplate) function, which is used to apply the custom templates, belongs to the [MessageList](/ui-kit/android/v4/message-list) component.
You can apply MessageTemplates to Messages Component using the following code snippet.
```java theme={null}
MessageListConfiguration configuration = new MessageListConfiguration();
List messageTemplates = CometChatUIKit.getDataSource(getMessageTemplates()
for(CometChatMessageTemplate template : messageTemplates)
Log.e(TAG, "messageTemplate: Type = "+template.getType());
if(template.getType().equals(UIKitConstants.MessageType.TEXT))
// Code to customize text message template
}
}
configuration.setTemplates(messageTemplates);
cometChatMessages.setMessageListConfiguration(configuration);
```
```kotlin theme={null}
val configuration = MessageListConfiguration.Builder(context).build()
val messageTemplates = CometChatUI.getAllMessageTemplates()
for (template in messageTemplates) {
Log.e(TAG, "messageTemplate: Type = ${template.type}")
if (template.type == UIKitConstants.MessageType.TEXT) {
// Code to customize text message template
}
}
configuration.setTemplates(messageTemplates)
cometChatMessages.setMessageListConfiguration(configuration)
```
#### Header view
The `.setHeaderView()` method of MessageTemplate allows you to add custom views to the header of your message bubbles. In the example below, we will add a custom layout `custom_txt_header_layout.xml` to the header view of every text message in the MessageList.
 ```xml custom_txt_header_layout theme={null}
```
```java theme={null}
template.setHeaderView(new MessagesViewHolderListener() {
@Override
public View createView(Context context, CometChatMessageBubble cometChatMessageBubble, UIKitConstants.MessageBubbleAlignment messageBubbleAlignment) {
return getLayoutInflater().inflate(R.layout.custom_txt_header_layout, null);
}
@Override
public void bindView(Context context, View view, BaseMessage baseMessage, UIKitConstants.MessageBubbleAlignment messageBubbleAlignment, RecyclerView.ViewHolder viewHolder, List list, int i) {
CometChatAvatar avatar = view.findViewById(R.id.avatar);
boolean isMyMsg = CometChatUIKit.getLoggedInUser().getUid().equals(baseMessage.getSender().getUid());
if(!isMyMsg)
avatar.setImage(baseMessage.getSender().getAvatar());
}
});
```
```kotlin theme={null}
template.setHeaderView(object : MessagesViewHolderListener {
override fun createView(
context: Context,
cometChatMessageBubble: CometChatMessageBubble,
messageBubbleAlignment: UIKitConstants.MessageBubbleAlignment
): View {
return layoutInflater.inflate(R.layout.custom_txt_header_layout, null)
}
override fun bindView(
context: Context,
view: View,
baseMessage: BaseMessage,
messageBubbleAlignment: UIKitConstants.MessageBubbleAlignment,
viewHolder: RecyclerView.ViewHolder,
list: List,
i: Int
) {
val avatar = view.findViewById(R.id.avatar)
val isMyMsg = CometChatUIKit.loggedInUser.uid.equals(baseMessage.sender.uid)
if (!isMyMsg)
avatar.setImage(baseMessage.sender.avatar)
}
})
```
In this code, The createView() method inflates the 'custom\_txt\_header\_layout.xml' as the header view for every message. The bindView() method allows you to bind your custom view, which will be called every time a ViewHolder for that message type is bound.
#### Content view
The `.setContentView()` method of MessageTemplate allows you to add a custom view to the content of your message bubbles. In the example below, we will add a custom layout `custom_message_content_layout.xml` to the content view of every text message in the MessageList.
```xml custom_txt_header_layout theme={null}
```
```java theme={null}
template.setHeaderView(new MessagesViewHolderListener() {
@Override
public View createView(Context context, CometChatMessageBubble cometChatMessageBubble, UIKitConstants.MessageBubbleAlignment messageBubbleAlignment) {
return getLayoutInflater().inflate(R.layout.custom_txt_header_layout, null);
}
@Override
public void bindView(Context context, View view, BaseMessage baseMessage, UIKitConstants.MessageBubbleAlignment messageBubbleAlignment, RecyclerView.ViewHolder viewHolder, List list, int i) {
CometChatAvatar avatar = view.findViewById(R.id.avatar);
boolean isMyMsg = CometChatUIKit.getLoggedInUser().getUid().equals(baseMessage.getSender().getUid());
if(!isMyMsg)
avatar.setImage(baseMessage.getSender().getAvatar());
}
});
```
```kotlin theme={null}
template.setHeaderView(object : MessagesViewHolderListener {
override fun createView(
context: Context,
cometChatMessageBubble: CometChatMessageBubble,
messageBubbleAlignment: UIKitConstants.MessageBubbleAlignment
): View {
return layoutInflater.inflate(R.layout.custom_txt_header_layout, null)
}
override fun bindView(
context: Context,
view: View,
baseMessage: BaseMessage,
messageBubbleAlignment: UIKitConstants.MessageBubbleAlignment,
viewHolder: RecyclerView.ViewHolder,
list: List,
i: Int
) {
val avatar = view.findViewById(R.id.avatar)
val isMyMsg = CometChatUIKit.loggedInUser.uid.equals(baseMessage.sender.uid)
if (!isMyMsg)
avatar.setImage(baseMessage.sender.avatar)
}
})
```
In this code, The createView() method inflates the 'custom\_txt\_header\_layout.xml' as the header view for every message. The bindView() method allows you to bind your custom view, which will be called every time a ViewHolder for that message type is bound.
#### Content view
The `.setContentView()` method of MessageTemplate allows you to add a custom view to the content of your message bubbles. In the example below, we will add a custom layout `custom_message_content_layout.xml` to the content view of every text message in the MessageList.
 ```java theme={null}
template.setContentView(new MessagesViewHolderListener() {
@Override
public View createView(Context context, CometChatMessageBubble cometChatMessageBubble, UIKitConstants.MessageBubbleAlignment messageBubbleAlignment) {
return getLayoutInflater().inflate(R.layout.custom_message_content_layout, null);
}
@Override
public void bindView(Context context, View view, BaseMessage baseMessage, UIKitConstants.MessageBubbleAlignment messageBubbleAlignment, RecyclerView.ViewHolder viewHolder, List list, int i) {
TextView txtMessage = view.findViewById(R.id.txt_msg);
if(baseMessage instanceof TextMessage)
txtMessage.setText(((TextMessage) baseMessage).getText());
}
});
```
```kotlin theme={null}
template.setContentView(object : MessagesViewHolderListener {
override fun createView(
context: Context,
cometChatMessageBubble: CometChatMessageBubble,
messageBubbleAlignment: UIKitConstants.MessageBubbleAlignment
): View {
return LayoutInflater.from(context).inflate(R.layout.custom_message_content_layout, null)
}
override fun bindView(
context: Context,
view: View,
baseMessage: BaseMessage,
messageBubbleAlignment: UIKitConstants.MessageBubbleAlignment,
viewHolder: RecyclerView.ViewHolder,
list: List,
i: Int
) {
val txtMessage = view.findViewById(R.id.txt_msg)
if (baseMessage is TextMessage) {
txtMessage.text = baseMessage.text
}
}
})
```
In this code, The createView() method inflates the 'custom\_message\_content\_layout.xml' as the content view for every message. The bindView() method allows you to bind your custom view, which will be called every time a ViewHolder for that message type is bound.
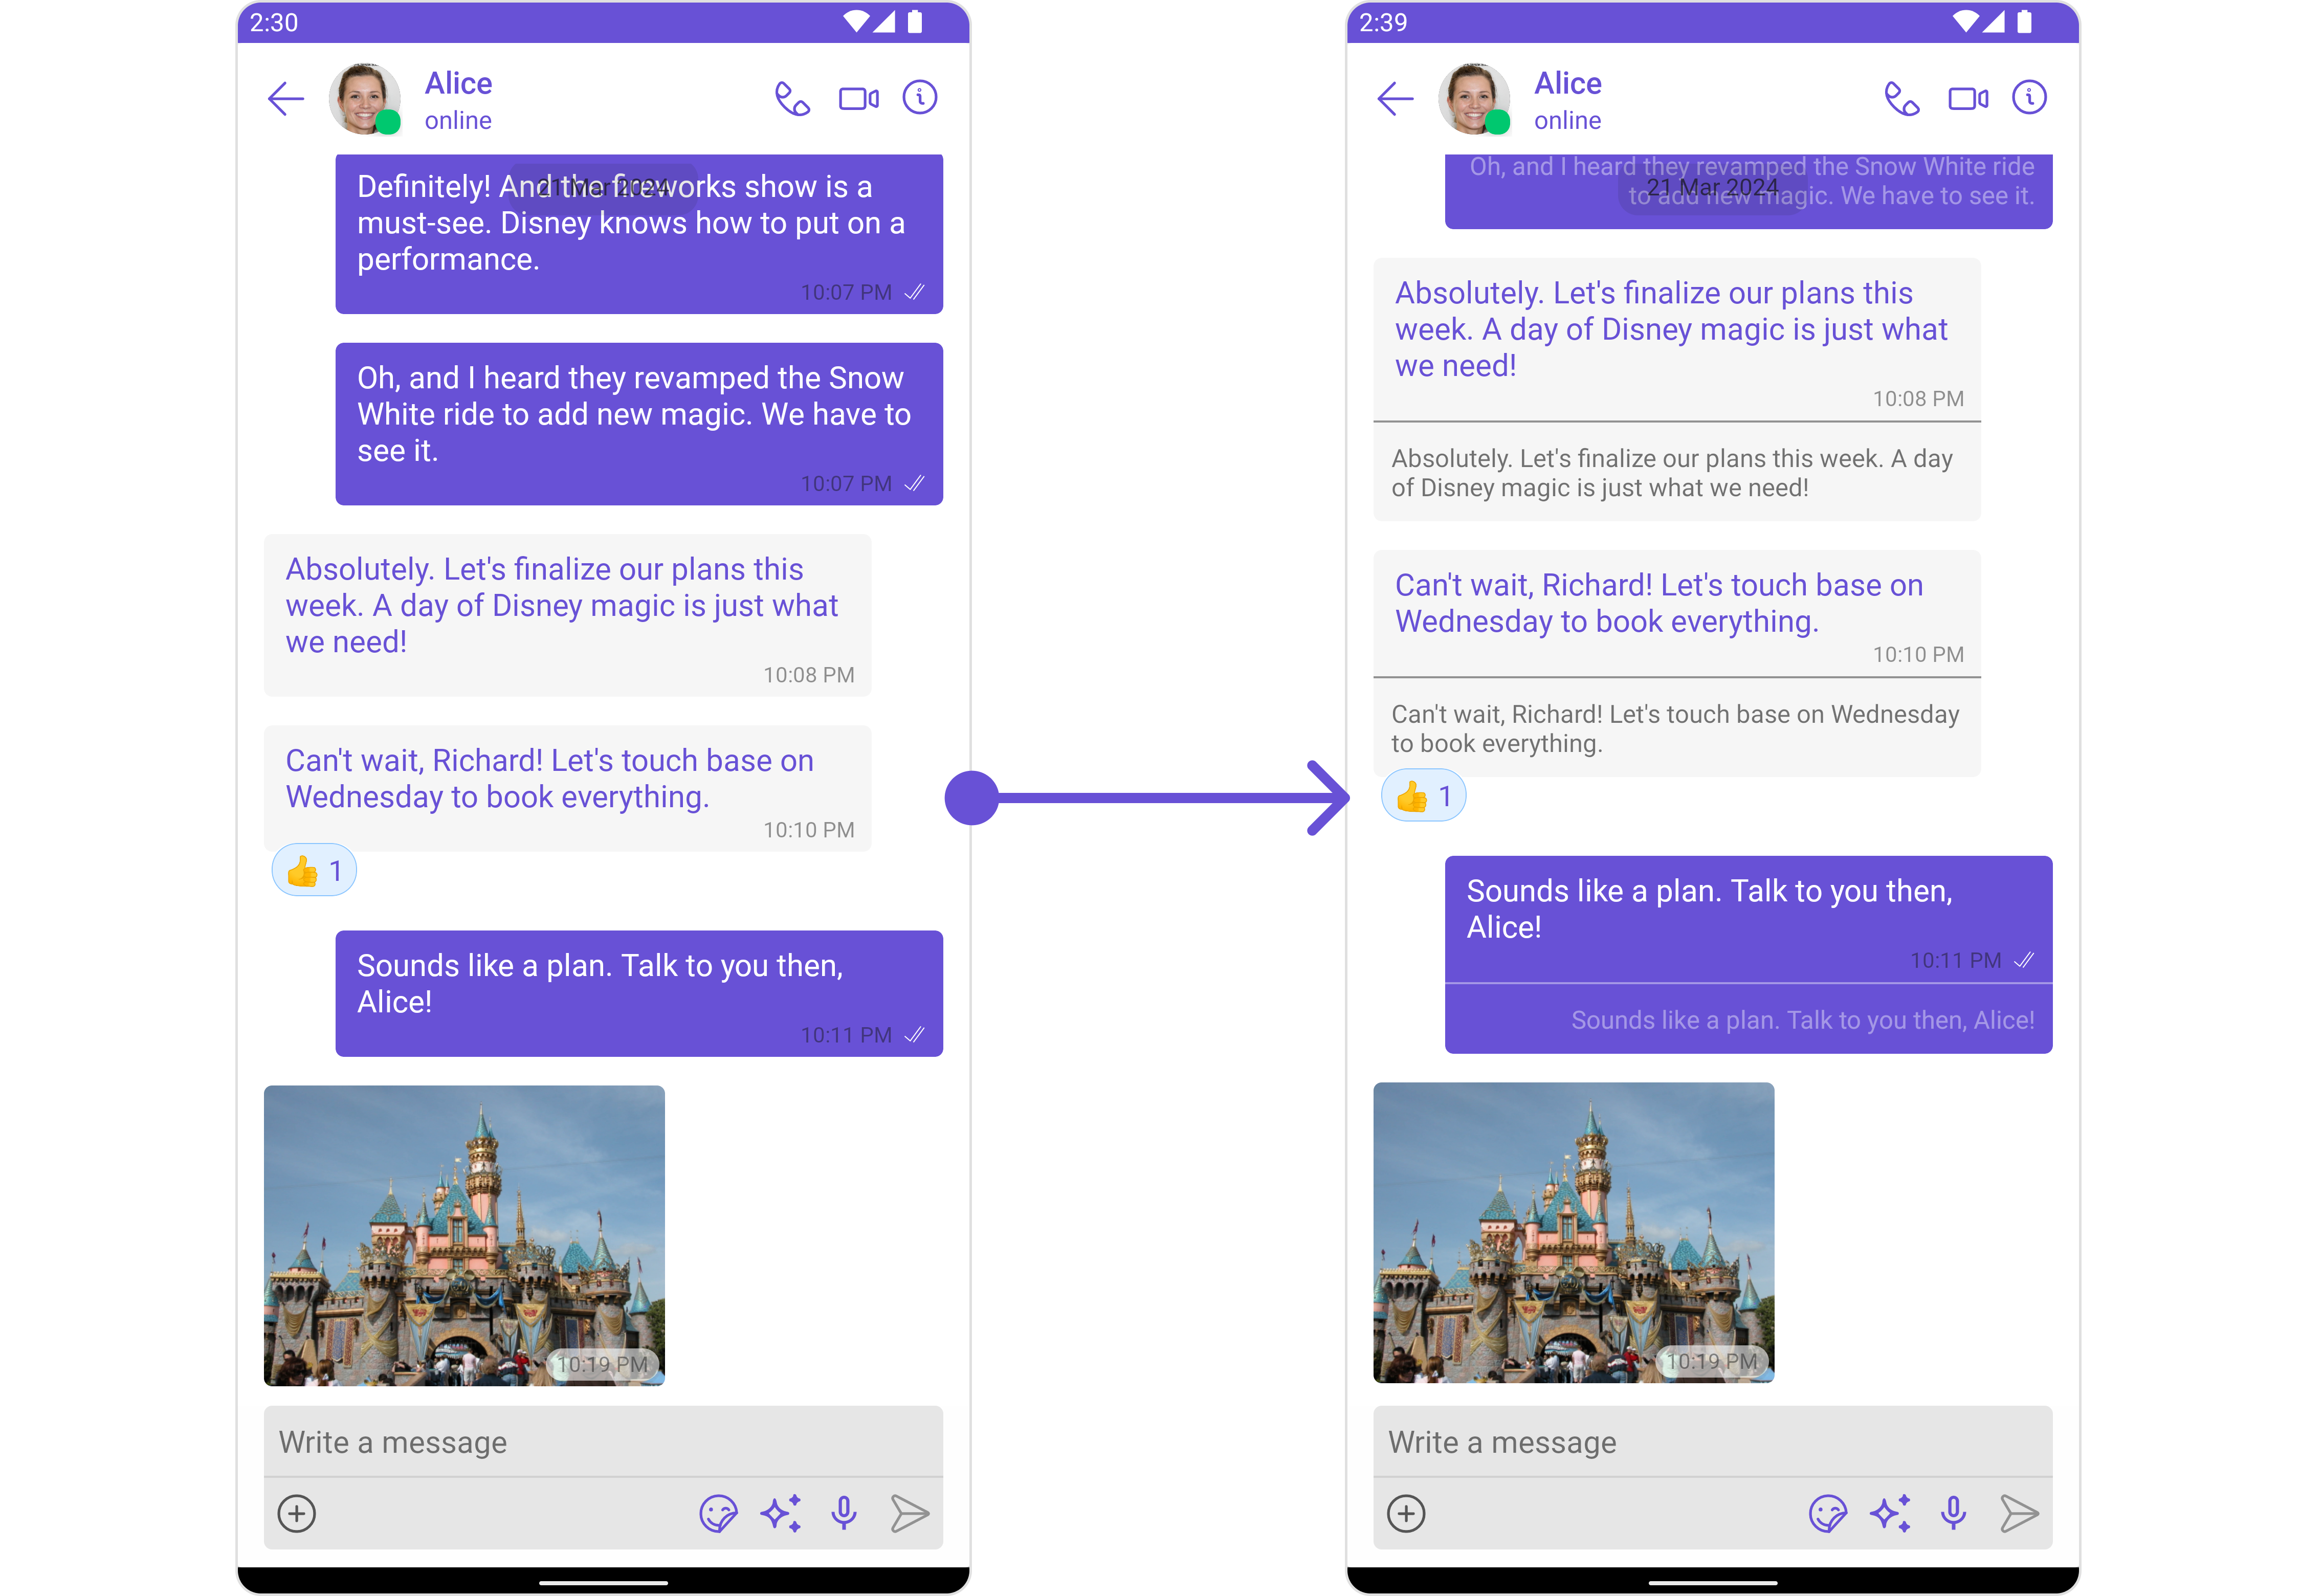
#### Bottom View
The `.setBottomView()` method of MessageTemplate allows you to add a custom button view to your message bubbles. In the example below, we will add a custom layout `custom_message_bottom_layout.xml` to the bottom view of every text message in the MessageList.
```java theme={null}
template.setContentView(new MessagesViewHolderListener() {
@Override
public View createView(Context context, CometChatMessageBubble cometChatMessageBubble, UIKitConstants.MessageBubbleAlignment messageBubbleAlignment) {
return getLayoutInflater().inflate(R.layout.custom_message_content_layout, null);
}
@Override
public void bindView(Context context, View view, BaseMessage baseMessage, UIKitConstants.MessageBubbleAlignment messageBubbleAlignment, RecyclerView.ViewHolder viewHolder, List list, int i) {
TextView txtMessage = view.findViewById(R.id.txt_msg);
if(baseMessage instanceof TextMessage)
txtMessage.setText(((TextMessage) baseMessage).getText());
}
});
```
```kotlin theme={null}
template.setContentView(object : MessagesViewHolderListener {
override fun createView(
context: Context,
cometChatMessageBubble: CometChatMessageBubble,
messageBubbleAlignment: UIKitConstants.MessageBubbleAlignment
): View {
return LayoutInflater.from(context).inflate(R.layout.custom_message_content_layout, null)
}
override fun bindView(
context: Context,
view: View,
baseMessage: BaseMessage,
messageBubbleAlignment: UIKitConstants.MessageBubbleAlignment,
viewHolder: RecyclerView.ViewHolder,
list: List,
i: Int
) {
val txtMessage = view.findViewById(R.id.txt_msg)
if (baseMessage is TextMessage) {
txtMessage.text = baseMessage.text
}
}
})
```
In this code, The createView() method inflates the 'custom\_message\_content\_layout.xml' as the content view for every message. The bindView() method allows you to bind your custom view, which will be called every time a ViewHolder for that message type is bound.
#### Bottom View
The `.setBottomView()` method of MessageTemplate allows you to add a custom button view to your message bubbles. In the example below, we will add a custom layout `custom_message_bottom_layout.xml` to the bottom view of every text message in the MessageList.
 ```xml custom_message_bottom_layout.xml theme={null}
```
```java theme={null}
template.setBottomView(new MessagesViewHolderListener() {
@Override
public View createView(Context context, CometChatMessageBubble cometChatMessageBubble, UIKitConstants.MessageBubbleAlignment messageBubbleAlignment) {
return getLayoutInflater().inflate(R.layout.custom_message_bottom_layout, null);
}
@Override
public void bindView(Context context, View view, BaseMessage baseMessage, UIKitConstants.MessageBubbleAlignment messageBubbleAlignment, RecyclerView.ViewHolder viewHolder, List list, int i) {
TextView tvMessage = view.findViewById(R.id.translate_message);
View divider = view.findViewById(R.id.view_divider);
boolean isMyMsg = CometChatUIKit.getLoggedInUser().getUid().equals(baseMessage.getSender().getUid());
if(baseMessage instanceof TextMessage){
tvMessage.setText(((TextMessage) baseMessage).getText());
if(isMyMsg){
tvMessage.setGravity(Gravity.END);
divider.setBackgroundColor(Color.parseColor("#66FFFFFF"));
tvMessage.setTextColor(Color.parseColor("#66FFFFFF"));
}
}
}
});
```
```kotlin theme={null}
template.setBottomView(object : MessagesViewHolderListener {
override fun createView(
context: Context,
cometChatMessageBubble: CometChatMessageBubble,
messageBubbleAlignment: UIKitConstants.MessageBubbleAlignment
): View {
return LayoutInflater.from(context).inflate(R.layout.custom_message_bottom_layout, null)
}
override fun bindView(
context: Context,
view: View,
baseMessage: BaseMessage,
messageBubbleAlignment: UIKitConstants.MessageBubbleAlignment,
viewHolder: RecyclerView.ViewHolder,
list: List,
i: Int
) {
val tvMessage = view.findViewById(R.id.translate_message)
val divider = view.findViewById(R.id.view_divider)
val isMyMsg = CometChatUIKit.loggedInUser.uid == baseMessage.sender.uid
if (baseMessage is TextMessage) {
tvMessage.text = baseMessage.text
if (isMyMsg) {
tvMessage.gravity = Gravity.END
divider.setBackgroundColor(Color.parseColor("#66FFFFFF"))
tvMessage.setTextColor(Color.parseColor("#66FFFFFF"))
}
}
}
})
```
In this code, The createView() method inflates the 'custom\_message\_bottom\_layout.xml' as the bottom view for every message. The bindView() method allows you to bind your custom view, which will be called every time a ViewHolder for that message type is bound.
#### Footer View
The `.setFooterView()` method of MessageTemplate allows you to add a footer view to your message bubbles. In the example below, we will add a custom layout custom\_menu\_layout.xml to the bottom view of every text message in the MessageList.
```xml custom_message_bottom_layout.xml theme={null}
```
```java theme={null}
template.setBottomView(new MessagesViewHolderListener() {
@Override
public View createView(Context context, CometChatMessageBubble cometChatMessageBubble, UIKitConstants.MessageBubbleAlignment messageBubbleAlignment) {
return getLayoutInflater().inflate(R.layout.custom_message_bottom_layout, null);
}
@Override
public void bindView(Context context, View view, BaseMessage baseMessage, UIKitConstants.MessageBubbleAlignment messageBubbleAlignment, RecyclerView.ViewHolder viewHolder, List list, int i) {
TextView tvMessage = view.findViewById(R.id.translate_message);
View divider = view.findViewById(R.id.view_divider);
boolean isMyMsg = CometChatUIKit.getLoggedInUser().getUid().equals(baseMessage.getSender().getUid());
if(baseMessage instanceof TextMessage){
tvMessage.setText(((TextMessage) baseMessage).getText());
if(isMyMsg){
tvMessage.setGravity(Gravity.END);
divider.setBackgroundColor(Color.parseColor("#66FFFFFF"));
tvMessage.setTextColor(Color.parseColor("#66FFFFFF"));
}
}
}
});
```
```kotlin theme={null}
template.setBottomView(object : MessagesViewHolderListener {
override fun createView(
context: Context,
cometChatMessageBubble: CometChatMessageBubble,
messageBubbleAlignment: UIKitConstants.MessageBubbleAlignment
): View {
return LayoutInflater.from(context).inflate(R.layout.custom_message_bottom_layout, null)
}
override fun bindView(
context: Context,
view: View,
baseMessage: BaseMessage,
messageBubbleAlignment: UIKitConstants.MessageBubbleAlignment,
viewHolder: RecyclerView.ViewHolder,
list: List,
i: Int
) {
val tvMessage = view.findViewById(R.id.translate_message)
val divider = view.findViewById(R.id.view_divider)
val isMyMsg = CometChatUIKit.loggedInUser.uid == baseMessage.sender.uid
if (baseMessage is TextMessage) {
tvMessage.text = baseMessage.text
if (isMyMsg) {
tvMessage.gravity = Gravity.END
divider.setBackgroundColor(Color.parseColor("#66FFFFFF"))
tvMessage.setTextColor(Color.parseColor("#66FFFFFF"))
}
}
}
})
```
In this code, The createView() method inflates the 'custom\_message\_bottom\_layout.xml' as the bottom view for every message. The bindView() method allows you to bind your custom view, which will be called every time a ViewHolder for that message type is bound.
#### Footer View
The `.setFooterView()` method of MessageTemplate allows you to add a footer view to your message bubbles. In the example below, we will add a custom layout custom\_menu\_layout.xml to the bottom view of every text message in the MessageList.
 ```html theme={null}
```
```typescript theme={null}
template.setFooterView(new MessagesViewHolderListener() {
@Override
public View createView(Context context, CometChatMessageBubble cometChatMessageBubble, UIKitConstants.MessageBubbleAlignment messageBubbleAlignment) {
return getLayoutInflater().inflate(R.layout.custom_menu_layout, null);
}
@Override
public void bindView(Context context, View view, BaseMessage baseMessage, UIKitConstants.MessageBubbleAlignment messageBubbleAlignment, RecyclerView.ViewHolder viewHolder, List list, int i) {
boolean isMyMsg = CometChatUIKit.getLoggedInUser().getUid().equals(baseMessage.getSender().getUid());
if(isMyMsg)
view.setVisibility(View.GONE);
}
});
```
In this code, The createView() method inflates the 'custom\_menu\_layout.xml' as the footer view for every message. The bindView() method allows you to bind your custom view, which will be called every time a ViewHolder for that message type is bound.
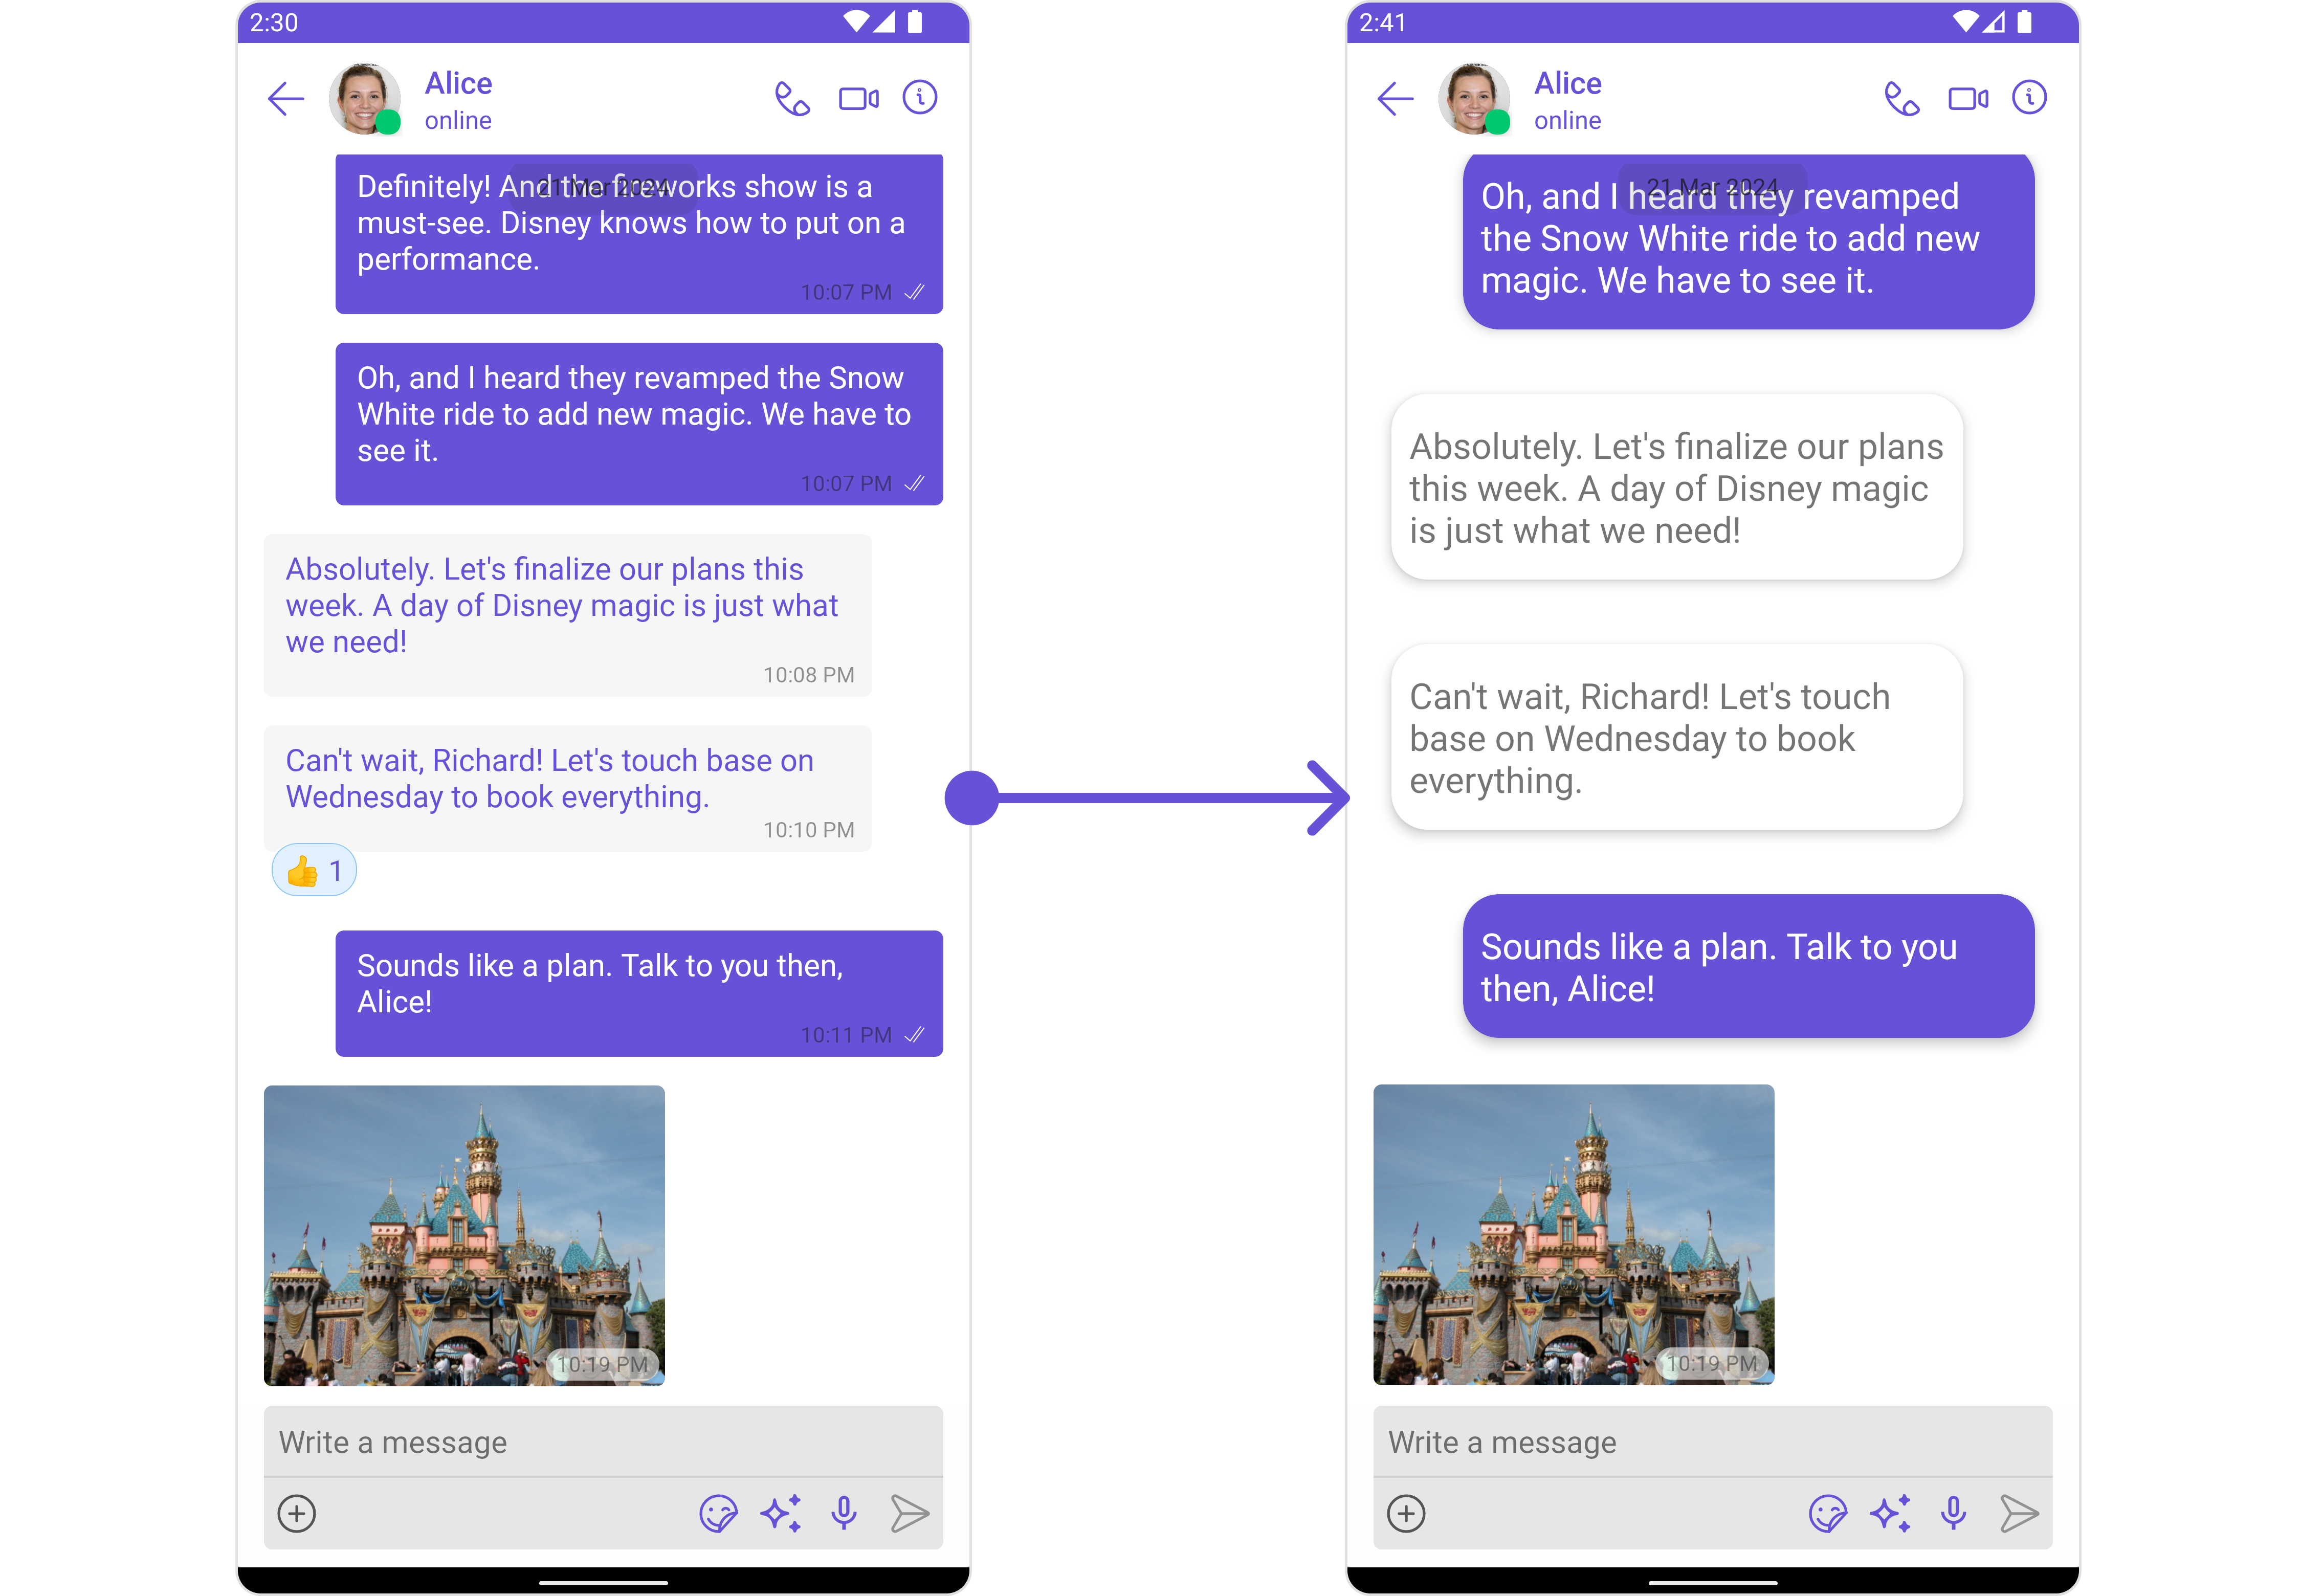
#### Bubble View
The` .setBubbleView()` method of MessageTemplate allows you to add a bubble view to your message bubbles. In the example below, we will add a custom layout custom\_message\_content\_layout.xml to the bubble view of every text message in the MessageList.
```html theme={null}
```
```typescript theme={null}
template.setFooterView(new MessagesViewHolderListener() {
@Override
public View createView(Context context, CometChatMessageBubble cometChatMessageBubble, UIKitConstants.MessageBubbleAlignment messageBubbleAlignment) {
return getLayoutInflater().inflate(R.layout.custom_menu_layout, null);
}
@Override
public void bindView(Context context, View view, BaseMessage baseMessage, UIKitConstants.MessageBubbleAlignment messageBubbleAlignment, RecyclerView.ViewHolder viewHolder, List list, int i) {
boolean isMyMsg = CometChatUIKit.getLoggedInUser().getUid().equals(baseMessage.getSender().getUid());
if(isMyMsg)
view.setVisibility(View.GONE);
}
});
```
In this code, The createView() method inflates the 'custom\_menu\_layout.xml' as the footer view for every message. The bindView() method allows you to bind your custom view, which will be called every time a ViewHolder for that message type is bound.
#### Bubble View
The` .setBubbleView()` method of MessageTemplate allows you to add a bubble view to your message bubbles. In the example below, we will add a custom layout custom\_message\_content\_layout.xml to the bubble view of every text message in the MessageList.
 ```html theme={null}
```
```java theme={null}
template.setBubbleView(new MessagesViewHolderListener() {
@Override
public View createView(Context context, CometChatMessageBubble cometChatMessageBubble, UIKitConstants.MessageBubbleAlignment messageBubbleAlignment) {
return getLayoutInflater().inflate(R.layout.custom_message_content_layout, null);
}
@Override
public void bindView(Context context, View view, BaseMessage baseMessage, UIKitConstants.MessageBubbleAlignment messageBubbleAlignment, RecyclerView.ViewHolder viewHolder, List list, int i) {
TextView textView = view.findViewById(R.id.txt_msg);
CardView cardView = view.findViewById(R.id.card_view);
boolean isMyMsg = CometChatUIKit.getLoggedInUser().getUid().equals(baseMessage.getSender().getUid());
if(baseMessage instanceof TextMessage)
textView.setText(((TextMessage) baseMessage).getText());
if(isMyMsg){
RelativeLayout.LayoutParams params = (RelativeLayout.LayoutParams)cardView.getLayoutParams();
params.addRule(RelativeLayout.ALIGN_PARENT_END);
cardView.setLayoutParams(params);
cardView.setCardBackgroundColor(getColor(R.color.purple_700));
textView.setTextColor(Color.WHITE);
}
}
});
```
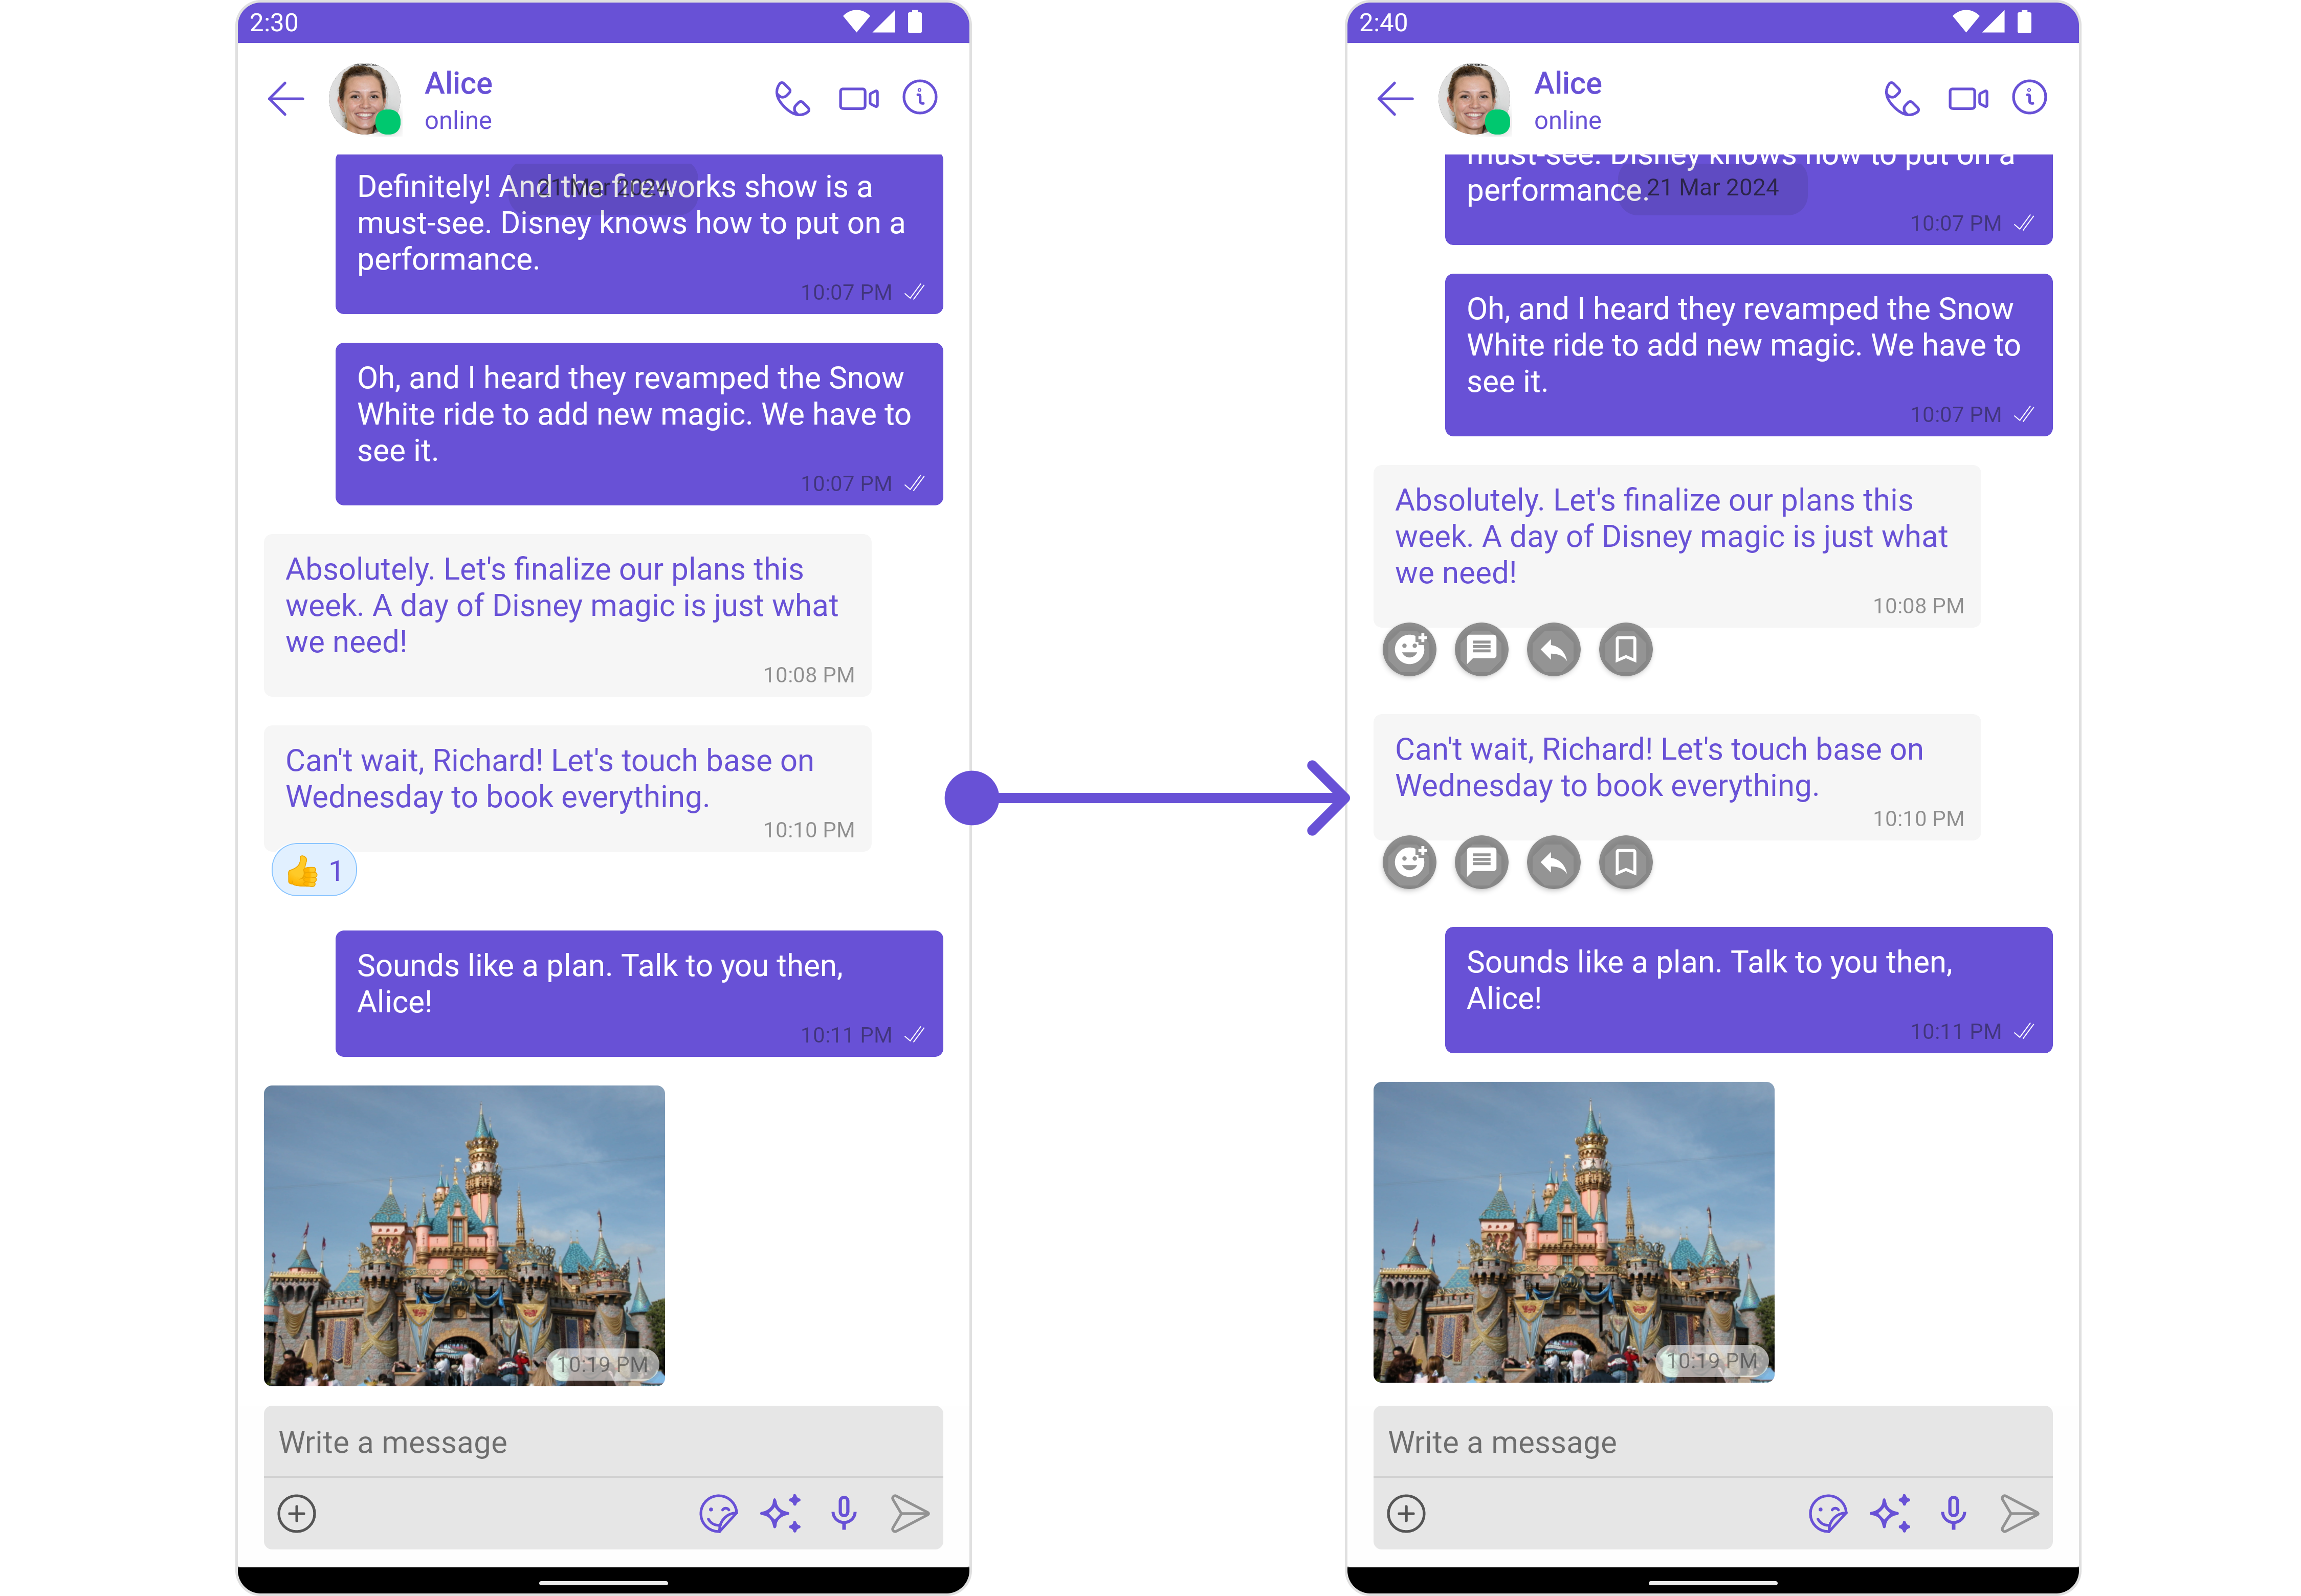
#### Options List
The `.setOptions()` method in the MessageTemplate allows you to customize the options that appear in the action sheet when a message is long-pressed. By default, CometChat UI Kit provides a set of options like "Reply", "Forward", "Edit", and "Delete".
However, if you wish to override or modify these options, you can use the `.setOptions()` method and pass a list of `CometChatMessageOption`. This list of options will replace the default set.
```html theme={null}
```
```java theme={null}
template.setBubbleView(new MessagesViewHolderListener() {
@Override
public View createView(Context context, CometChatMessageBubble cometChatMessageBubble, UIKitConstants.MessageBubbleAlignment messageBubbleAlignment) {
return getLayoutInflater().inflate(R.layout.custom_message_content_layout, null);
}
@Override
public void bindView(Context context, View view, BaseMessage baseMessage, UIKitConstants.MessageBubbleAlignment messageBubbleAlignment, RecyclerView.ViewHolder viewHolder, List list, int i) {
TextView textView = view.findViewById(R.id.txt_msg);
CardView cardView = view.findViewById(R.id.card_view);
boolean isMyMsg = CometChatUIKit.getLoggedInUser().getUid().equals(baseMessage.getSender().getUid());
if(baseMessage instanceof TextMessage)
textView.setText(((TextMessage) baseMessage).getText());
if(isMyMsg){
RelativeLayout.LayoutParams params = (RelativeLayout.LayoutParams)cardView.getLayoutParams();
params.addRule(RelativeLayout.ALIGN_PARENT_END);
cardView.setLayoutParams(params);
cardView.setCardBackgroundColor(getColor(R.color.purple_700));
textView.setTextColor(Color.WHITE);
}
}
});
```
#### Options List
The `.setOptions()` method in the MessageTemplate allows you to customize the options that appear in the action sheet when a message is long-pressed. By default, CometChat UI Kit provides a set of options like "Reply", "Forward", "Edit", and "Delete".
However, if you wish to override or modify these options, you can use the `.setOptions()` method and pass a list of `CometChatMessageOption`. This list of options will replace the default set.
 ```csharp theme={null}
template.setOptions((context, baseMessage, group) -> {
List optionList = new ArrayList<>();
CometChatMessageOption option1 = new CometChatMessageOption("delete","Delete",Color.RED, com.cometchat.chatuikit.R.drawable.cometchat_ic_delete_conversation,Color.RED,0,Color.WHITE,null);
optionList.add(option1);
CometChatMessageOption option2 = new CometChatMessageOption("forward","Forward",Color.BLACK,R.drawable.ic_reply,Color.GRAY,0,Color.WHITE,null);
optionList.add(option2);
CometChatMessageOption option3 = new CometChatMessageOption("Star","Mark as Favorite",Color.BLACK, com.cometchat.chatuikit.R.drawable.cometchat_heart_reaction,Color.GRAY,0,Color.WHITE,null);
optionList.add(option3);
return optionList;
});
```
### New Templates
You can create an entirely new template for custom messages is one of the powerful features of CometChat's MessageTemplate.
First, let's see how to send a custom message:
```typescript theme={null}
CustomMessage customMessage = new CustomMessage("uid-1001", CometChatConstants.RECEIVER_TYPE_USER,"custom_buzz",new JSONObject().put("message_type","buzz_message"));
CometChatUIKit.sendCustomMessage(customMessage, new CometChat.CallbackListener() {
@Override
public void onSuccess(CustomMessage customMessage) {
Log.e(TAG, "onSuccess: Messages sending success = "+customMessage );
}
@Override
public void onError(CometChatException e) {
Log.e(TAG, "onError: Message Sending ",e );
}
});
```
Now, we'll create a new MessageTemplate to render this custom message in the MessageList:
```java theme={null}
List messageTemplates = CometChatUIKit.getDataSource().getMessageTemplates();
CometChatMessageTemplate messageTemplate = new CometChatMessageTemplate()
.setCategory(CometChatConstants.CATEGORY_CUSTOM)
.setType("custom_buzz")
.setBubbleView(new MessagesViewHolderListener() {
@Override
public View createView(Context context, CometChatMessageBubble cometChatMessageBubble, UIKitConstants.MessageBubbleAlignment messageBubbleAlignment) {
return getLayoutInflater().inflate(R.layout.custom_buzz_message_layout, null);
}
@Override
public void bindView(Context context, View view, BaseMessage baseMessage, UIKitConstants.MessageBubbleAlignment messageBubbleAlignment, RecyclerView.ViewHolder viewHolder, List list, int i) {
}
});
messageTemplates.add(messageTemplate);
```
In this code, replace "customType" with the same type as your custom message, and define your custom view in the setContentView() method.
This way, your custom message will be rendered in the MessageList using the custom view defined in your new MessageTemplate.
```csharp theme={null}
template.setOptions((context, baseMessage, group) -> {
List optionList = new ArrayList<>();
CometChatMessageOption option1 = new CometChatMessageOption("delete","Delete",Color.RED, com.cometchat.chatuikit.R.drawable.cometchat_ic_delete_conversation,Color.RED,0,Color.WHITE,null);
optionList.add(option1);
CometChatMessageOption option2 = new CometChatMessageOption("forward","Forward",Color.BLACK,R.drawable.ic_reply,Color.GRAY,0,Color.WHITE,null);
optionList.add(option2);
CometChatMessageOption option3 = new CometChatMessageOption("Star","Mark as Favorite",Color.BLACK, com.cometchat.chatuikit.R.drawable.cometchat_heart_reaction,Color.GRAY,0,Color.WHITE,null);
optionList.add(option3);
return optionList;
});
```
### New Templates
You can create an entirely new template for custom messages is one of the powerful features of CometChat's MessageTemplate.
First, let's see how to send a custom message:
```typescript theme={null}
CustomMessage customMessage = new CustomMessage("uid-1001", CometChatConstants.RECEIVER_TYPE_USER,"custom_buzz",new JSONObject().put("message_type","buzz_message"));
CometChatUIKit.sendCustomMessage(customMessage, new CometChat.CallbackListener() {
@Override
public void onSuccess(CustomMessage customMessage) {
Log.e(TAG, "onSuccess: Messages sending success = "+customMessage );
}
@Override
public void onError(CometChatException e) {
Log.e(TAG, "onError: Message Sending ",e );
}
});
```
Now, we'll create a new MessageTemplate to render this custom message in the MessageList:
```java theme={null}
List messageTemplates = CometChatUIKit.getDataSource().getMessageTemplates();
CometChatMessageTemplate messageTemplate = new CometChatMessageTemplate()
.setCategory(CometChatConstants.CATEGORY_CUSTOM)
.setType("custom_buzz")
.setBubbleView(new MessagesViewHolderListener() {
@Override
public View createView(Context context, CometChatMessageBubble cometChatMessageBubble, UIKitConstants.MessageBubbleAlignment messageBubbleAlignment) {
return getLayoutInflater().inflate(R.layout.custom_buzz_message_layout, null);
}
@Override
public void bindView(Context context, View view, BaseMessage baseMessage, UIKitConstants.MessageBubbleAlignment messageBubbleAlignment, RecyclerView.ViewHolder viewHolder, List list, int i) {
}
});
messageTemplates.add(messageTemplate);
```
In this code, replace "customType" with the same type as your custom message, and define your custom view in the setContentView() method.
This way, your custom message will be rendered in the MessageList using the custom view defined in your new MessageTemplate.